One of the most common ways to photograph apparel is by utilizing mannequins, however they don't come cheap but we are able to resolve this problem by combining multiple images into one single image.
Photography is more than a medium for factual communication of ideas. It is a creative art.
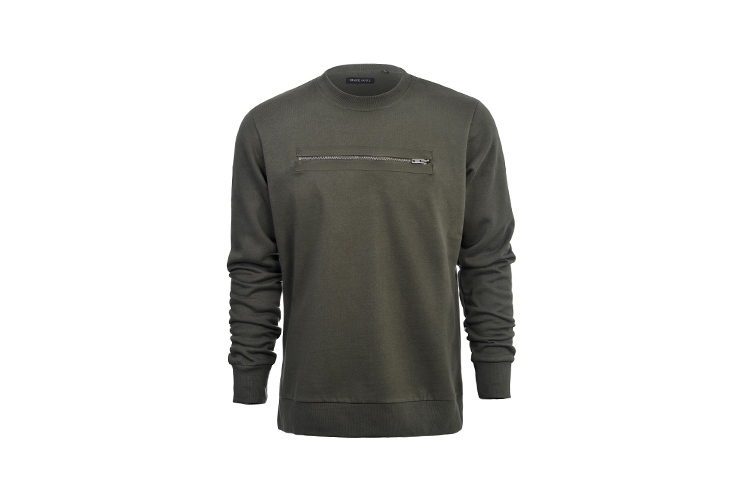
In order to create the invisible mannequin illusion (or ghost mannequin as it’s sometimes referred to), you will need just two photos and your good to go.
People often think that this type of photography is very complicated to reproduce but like most challenges, taking it step by step, will show that its actually not that hard.
Take two shots: one front shot of your garment and one inside out shot of your garment. The first photo serves as the base, the second, is stitched onto the first.
First, lay the garment flat on the tabletop and align the .Lay out the arms and smooth out the creases by running your hands over the fabric. Adding some tissue paper to the arms and shoulders can give your garment a more natural, stand out look.
Just grab some tissue paper and scrunch it up. Insert the tissue paper into the arms, shoulder area and the main body of the garment.
When laid flat, your garment will look a lot wider than it would be when worn. To give the shirt a more natural look, you can use a combination of pins and clever folding - particularly around the sides and arms.
Begin by folding and tucking in the sides of the garment and pinning around the back to avoid them being seen in shot. This will give your garment a slimmer look.
Once you are done with the front shot, repeat these steps but this time the garment needs to be inside out.
The reason you’re doing this is so you can get a clear view of the tag area (behind the neck or waist), as well as the lower back of the hem.
Make sure to use the same lighting conditions for both shots. The easiest way to do this is to mark the garments’s location and make sure to place it in exactly the same spot.
Import your images to your computer and open up Photoshop, then follow these steps:
Unlock the background layer by clicking the lock next to it. It’ll automatically be renamed to ‘Layer 0’.
Create a new blank layer and name it ‘background’. Fill the layer with white. This layer will be the background of the final image.
Reorder your layers so ‘front’ is at the top, ‘background’ is at the bottom. You can do this by clicking and dragging them up and down.
Now it’s time to remove the background. You’ll need to use your favourite selection tool to create a selection around the product on your ‘front’ layer.
If you are using polygonal lasso tool go to ‘Select’ > ‘Inverse’ at the top of your Photoshop window. Hit ‘Delete’ on the keyboard and your product should be sitting on white. Remember to cut out the neck area.
Open your ‘inside out’ image in Photoshop and remove the background.
Reorder the layers so ‘back’ is behind ‘front’ but the white background is behind both.
After making sure ‘back’ is selected, move it around and resize it (hit Ctrl + T / Command + T to enable the free transform tool) until you find the best position for it. Sometimes you may find it fits perfectly. You can also use the lasso tool to delete any bits that shouldn’t be visible.
Select the eraser tool and set it to brush mode with an opacity of 25%. On the neck/cuff/hem areas, use this tool to blend the front layer into the back by gradually and softly erasing it.
Select the brush tool and set it to black (#000000) with an opacity of 15%. Use this tool to create a natural-looking shadow in the places where the front and back meet. This will make the piece look more realistic and give it some dimension. Just make sure you don’t overdo it! A few strokes should create a nice illusion of depth.
Resize and save the image.
And that’s it, you’re done!